How to Download Photos in Pic-Time

Pic-time is a gallery app used by thousands of photographers because of its incredible features, one of which is the ability to include product snapshots using clients' imagery.
While the app is laid out in a very user-friendly way, inevitably, each year, I have a few clients who need clarification about how to download their images.
I modified the instructions straight from Pic-Time to walk you through it.
Steps to Downloading Photos on a Desktop
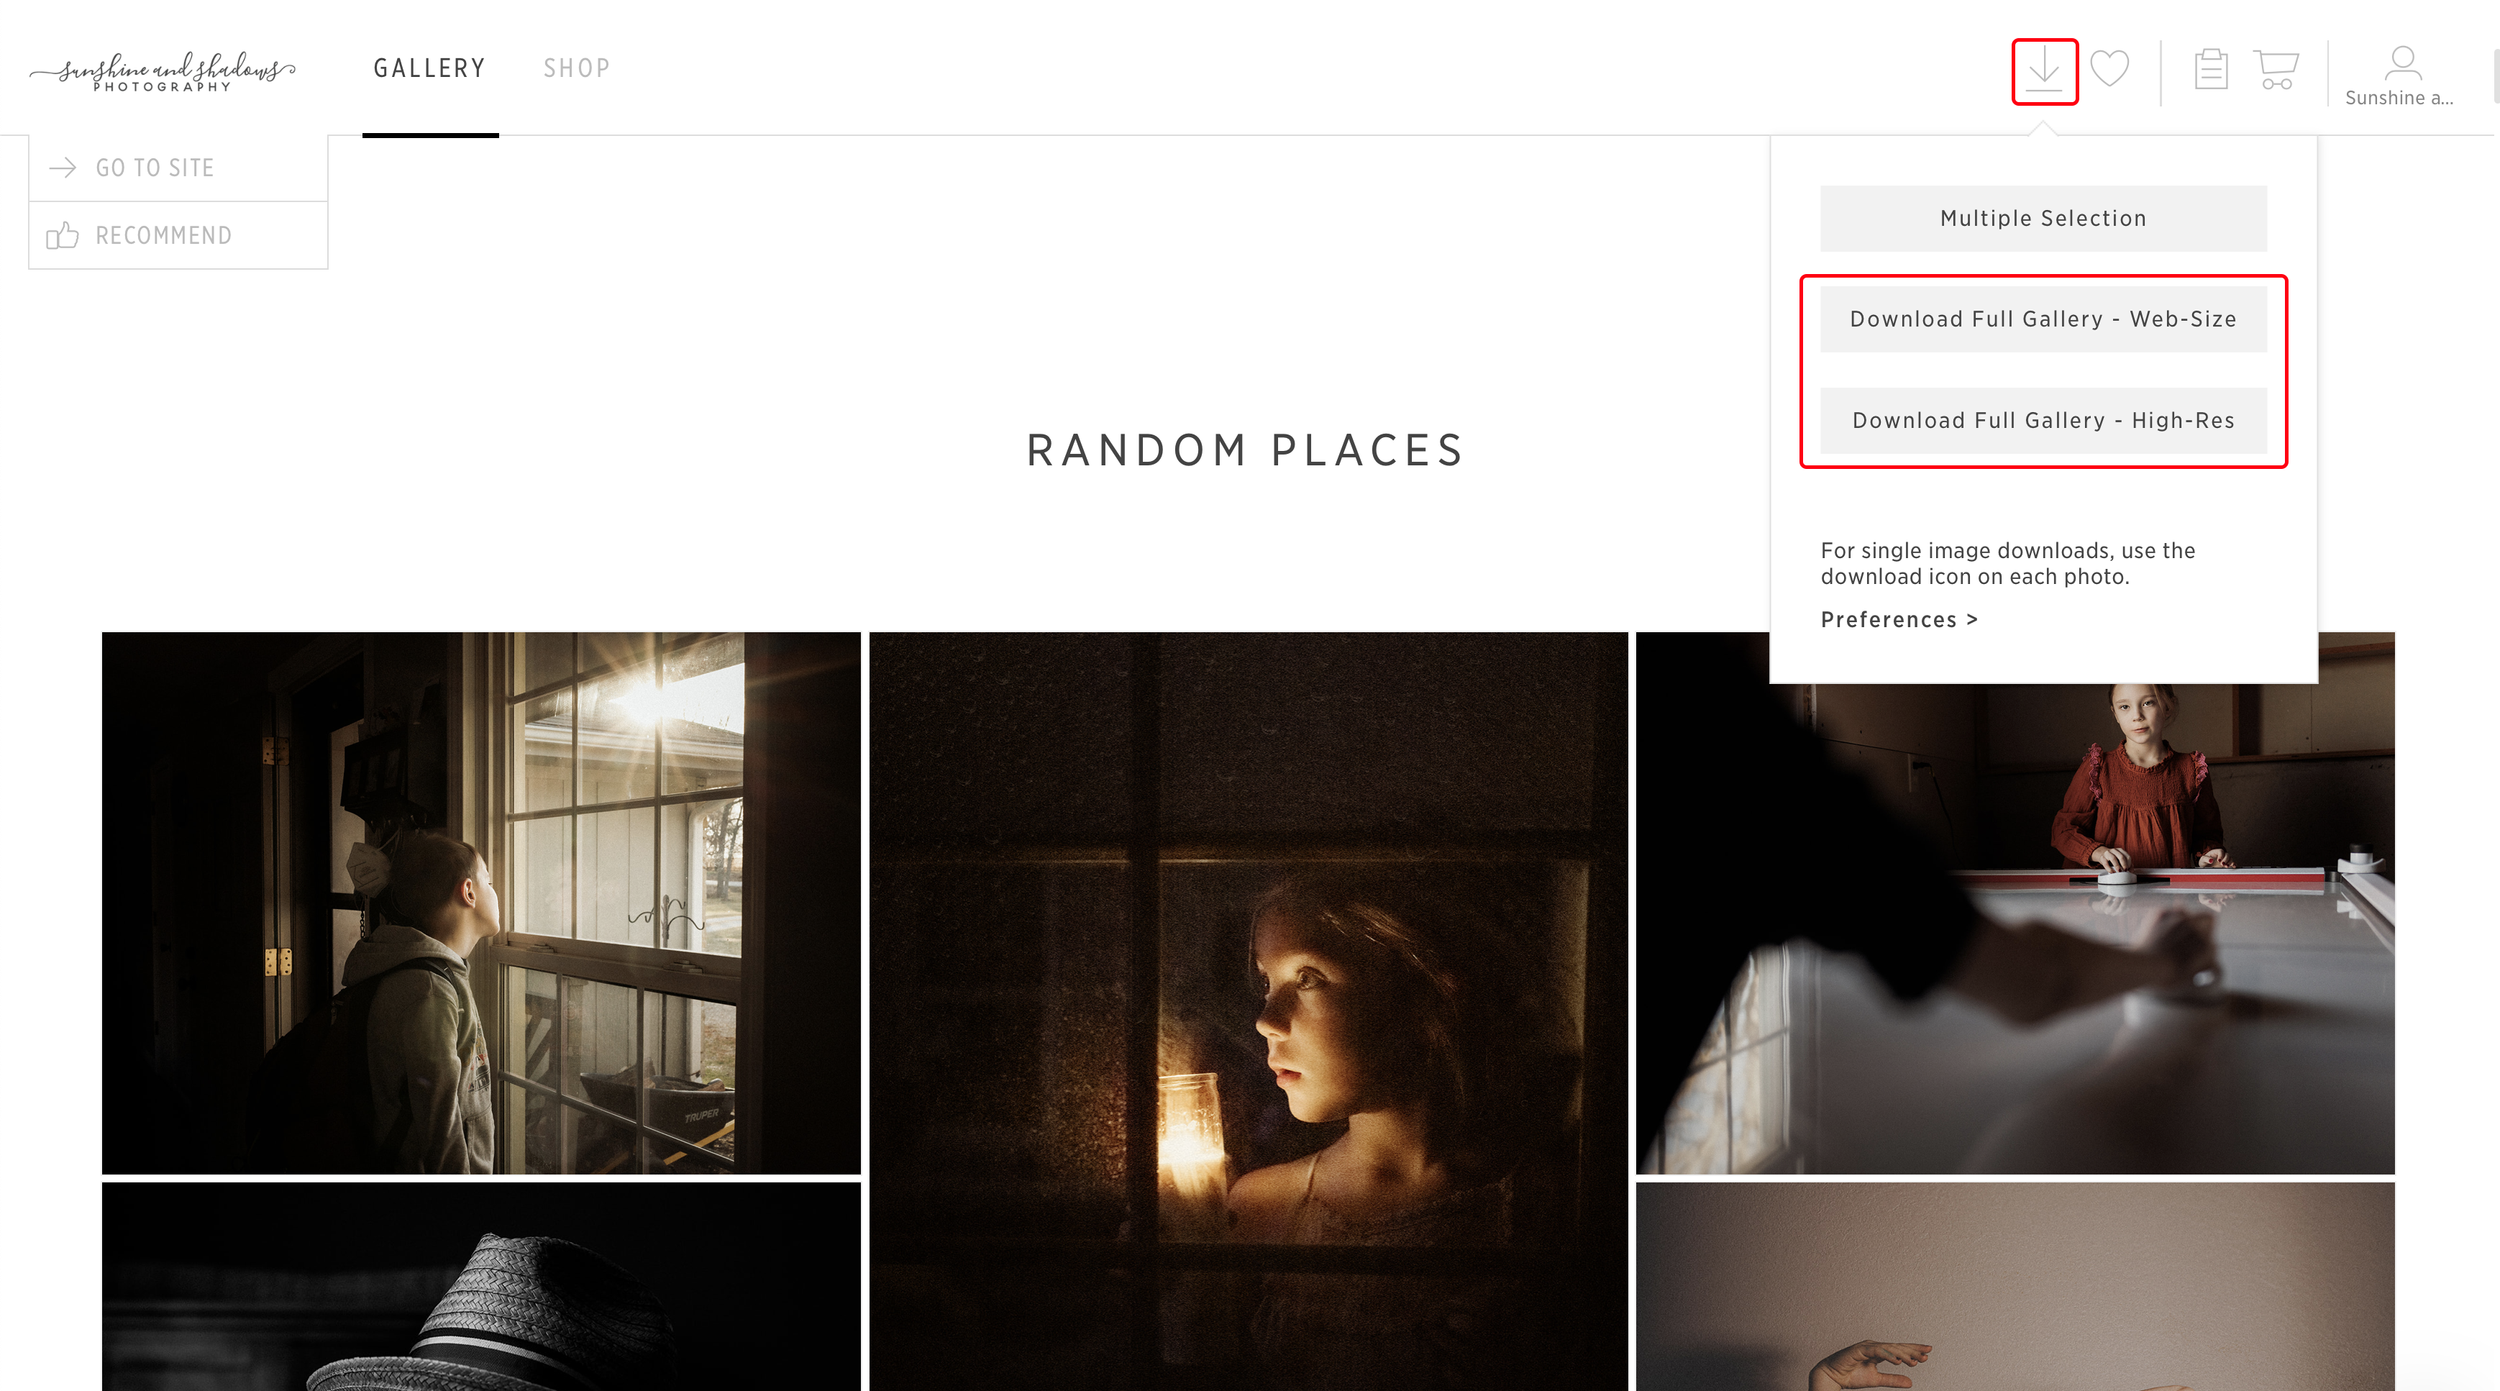
How to Download All the Photos from Your Gallery
1. To download all of the images in the gallery, click the downward-facing arrow in the upper right corner of the page and select Download Full Gallery.
2. Click Download to Computer. If you prefer, you can also choose Save to Dropbox or Save to Google Photos.

3. Images are grouped in a zip file(s) to optimize download speed. Click photos.zip to download them to your computer.
Your computer will save the zip file to the designated downloads folder. After you're done downloading, extract the photos from the zip file by double clicking on the zip folder. If a double click doesn't work, try a third-party software for zip file extraction.
If your gallery has multiple scenes, the Pic-Time app splits the images into subfolders named after the scenes in the downloaded folder.

Downloading a Selection of Photos
1. To download a selection of images from your gallery, click the downward-facing arrow in the upper right corner of the screen. Select Multiple Selection.

2. Choose photos from any of the collections on the left side.

3. Collections include Favorites, Gallery Scenes, Selections for Photographer, and Previously Downloaded. You can choose specific photos within a collection or click to Select All or Unselect All. Once you select your images, choose the size you want to download.

4. Click Download to Computer. If you prefer, you can also Save to Dropbox or Save to Google Photos.
5. Images are grouped in a zip file(s) to optimize download speed. Click on photos.zip to download to your computer.
Your computer will save the zip file to the designated downloads folder. After you're done downloading, extract the photos from the zip file by double clicking on the zip folder. If a double click doesn't work, try a third-party software for zip file extraction.
Download Your Photos One at a Time
1. To start selecting photos, hover over the image in the gallery and click on the downward-facing arrow.

2. Next, select the image quality, save the destination, checkmark download terms, and click Continue.
You've downloaded the image to your designated Downloads folder, Dropbox, or Google Photos.

Steps to Downloading Photos on a Mobile
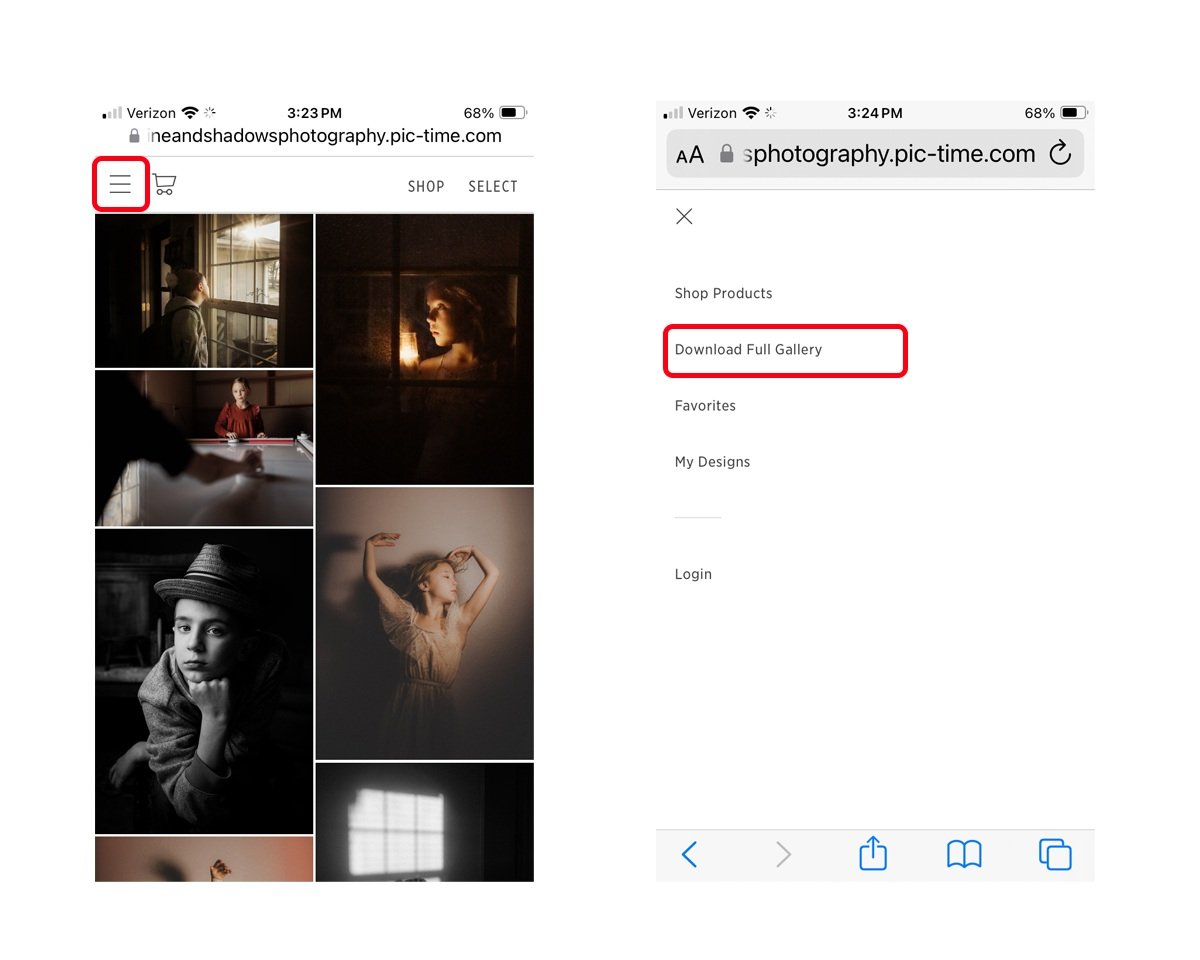
How to Download All the Photos from Your Gallery
1. To download all photos, click on the menu button in the upper left corner of the gallery and select Download Full Gallery.
2. Select Download to Mobile, then click on the zip file.
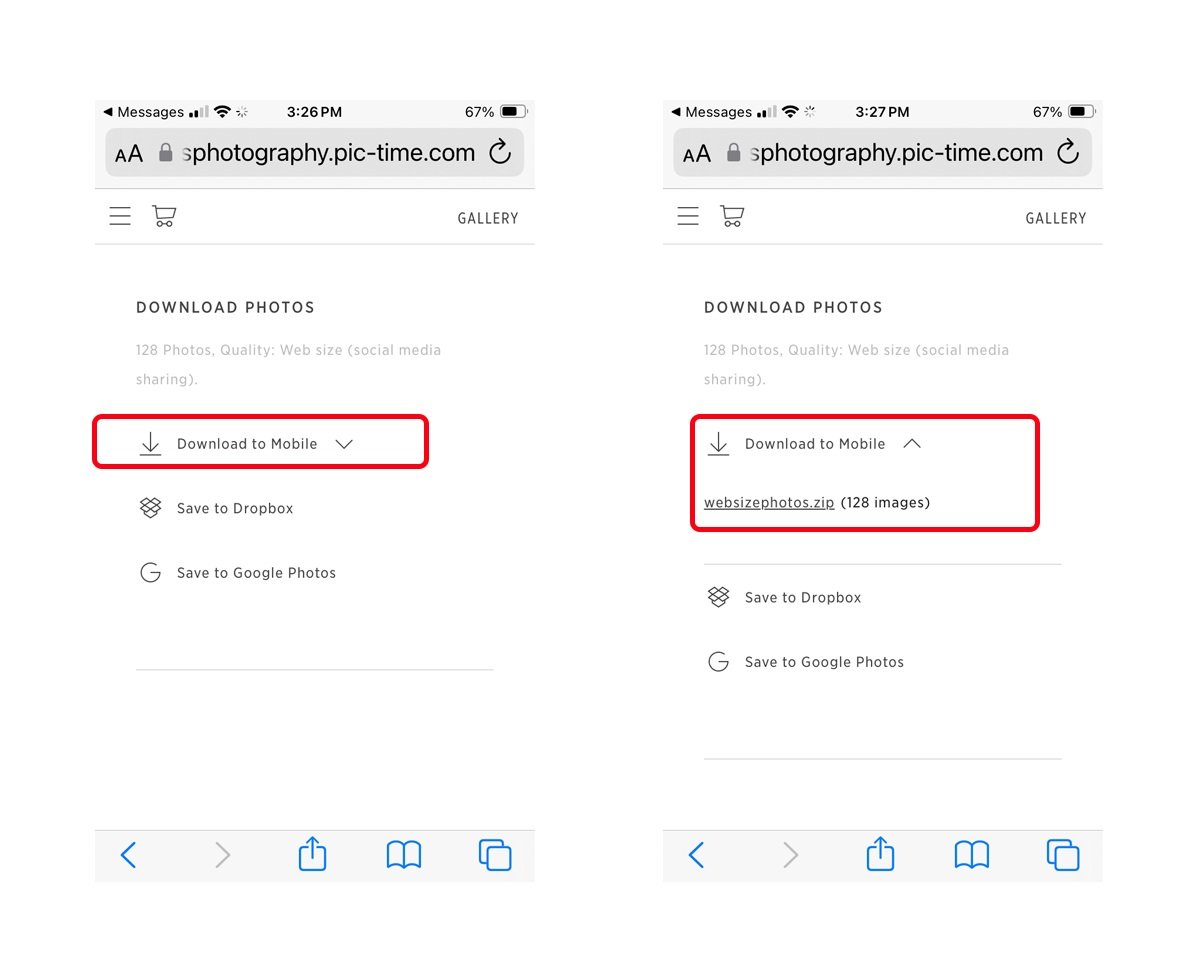
3. Your phone will download the .zip folder to your Files app, which you can extract into your Photo library.
Downloading a Selection of Photos
1. To download a selection of mobile images, click Select in the upper right corner. Checkmark the images you would like to download. Click Download and Share and select Download.

2. Choose the size (if available) and click Download to Mobile to download the images to your mobile device. If you prefer, you can save your photos to Dropbox or Google Photos.

3. Then click on the .zip file.

4. Your phone will download the .zip folder to your Files app, which you can extract into your Photo library.
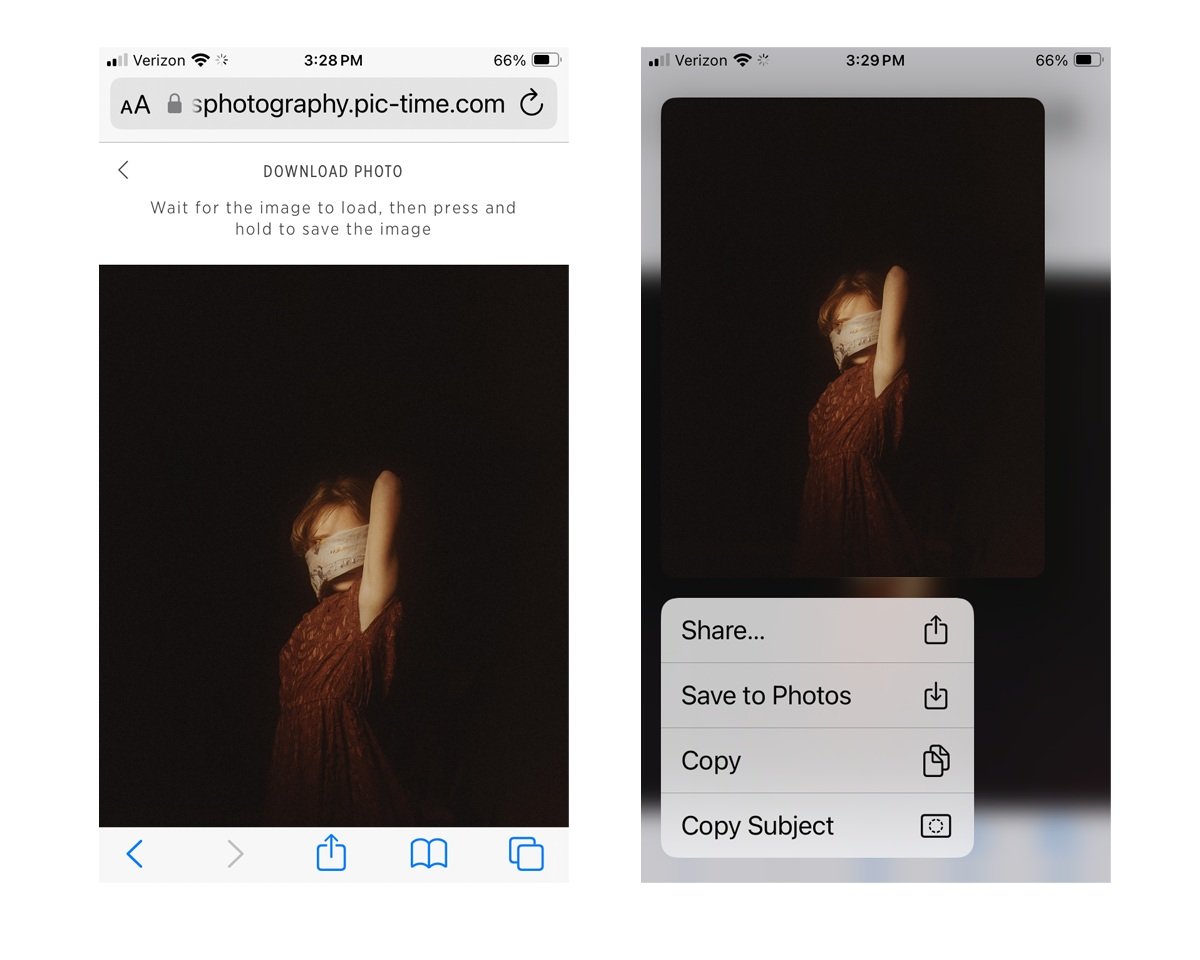
Download Your Photos One at a Time
1. Click the photo you want to download and select the downward-facing arrow at the top.

2. Select High-Res or Web-Size (if available) and select Download to Mobile, Google Photos, or Dropbox.

3. Wait for the image to load, then tap and hold to save the image. Select Add to Photos to save the image to your photos folder. [Note: This step may vary depending on your mobile device.]